
Real-life sofa preview
How I actually used AI to see a sofa in my room before buying it
The first time I tried this, I was sitting on my floor with a room photo on one tab, a sofa listing on another, and that very specific feeling that I was about to make an expensive mistake. The sofa looked great online. My room did not look like the product page.
So I stopped guessing and tried the simple version: upload the room, add the sofa, tell the AI what I wanted, and see what broke first. A photo-based tool like uniify.space is built for exactly that kind of fast room test.[1]




Transformed with AI by Uniify
I didn’t want to buy a sofa blind again
The first time I tried to “place” a sofa in my room with AI, it was not some big design moment. It was me looking at a sofa online and thinking, this is either going to look great or completely wreck the room, and I honestly cannot tell from the product page.
That was the whole reason I tried it. Not because I wanted some fancy render. I just wanted to know whether the thing would look normal in my actual room, with my wall color, my weird light, and my not-as-big-as-I-think-it-is floor space.
What I wanted
- A quick sense of size
- A real feeling for color in my room
- Proof that the sofa would not overpower the space
- A way to stop guessing from product photos
What I got wrong early
- I thought one image would answer everything
- I trusted “looks nice” too quickly
- I confused visual fit with actual fit
- I treated the first result like a decision
And yes, all the boring advice still matters. Retail guides from IKEA, Wayfair, and West Elm still say the same thing: measure the room, plan the footprint, and check the delivery path before you buy.[3][4][5]
It turned out I only needed three basic things
A decent room photo
Not perfect. Just clear, bright, and taken from a normal angle so the AI had something real to work with.
A sofa image or product page
I used a product image first, then sometimes just described the sofa when I did not have a clean reference shot.
A tool that edits room photos
I needed something simple enough that I could upload the room and test the idea fast. Uniify fits that kind of flow.[1]
My first result was bad because my first photo was bad
This was such a dumb mistake, but it mattered more than anything else. I used some random photo already sitting in my phone. It was dark, slightly tilted, and the area where the sofa was supposed to go was not even fully clear.
The AI result looked impressive for a second, then weird. The sofa felt too big. Then too flat. Then kind of like it was hovering. It looked like my room, but also not really my room.
Bad first try
├─ old phone photo
├─ bad lighting
├─ angle slightly off
├─ clutter near the wall
└─ result looked "cool" but not trustworthy

Better second try
├─ fresh photo
├─ daylight
├─ straight angle
├─ empty placement zone
└─ result instantly felt more believable
That was the moment I stopped blaming the AI and realized I had given it bad input. Once I retook the room shot properly, the whole thing got easier. If your tool lets you clean up or transform the room photo first, that helps too, and Uniify is built around those space-editing workflows.[1]
What I actually did step by step after the first mess
1. I uploaded a cleaner room photo
I took a new picture in daylight, from a normal standing angle, with the floor area visible. That alone made the room feel more “readable” to the AI. On a platform like www.uniify.space, this is the natural starting point: upload the room first, then tell the AI what change you want.[1]
2. I added the sofa reference instead of hoping the AI would guess
When I gave it an actual sofa image, things got more stable. When I did not have one, I had to describe it better than I expected: three-seat, low profile, beige fabric, slim legs, left chaise, that kind of thing.
3. I stopped writing lazy prompts
This was the second big mistake. At first I wrote things like “put this sofa in my room.” That is not really an instruction. That is me hoping the tool reads my mind. Once I got more specific, the results got much more useful.
4. I made more than one version because the first one kept lying to me
This was probably the most useful habit. One size up. One size down. One lighter fabric. One darker one. The first version often looked exciting. The second and third versions were where the truth showed up.
What finally worked
   ↓
clean room photo
   ↓
clear prompt
   ↓
version A: original idea
version B: slightly smaller
version C: slightly larger
version D: different color
   ↓
compare all four instead of trusting one
The easiest version of this process
If all you want is to see whether a sofa works in your actual room, a photo-first tool is usually enough. Uniify is made for that kind of quick in-room preview without turning the whole thing into a full design project.[1]
Try the room preview workflow on UniifyI learned to stop asking “does this look nice?”
The tricky part was not getting a nice-looking render. The tricky part was learning how to read it. At first I would see a good image and think, great, done. Then I would stare at it longer and realize the sofa felt too deep, too high, too bulky, or just weirdly heavy for the room.
So I started checking really simple things instead of trusting the vibe.
Scale
I compared the sofa with the window, radiator, side table, and wall space. If it felt huge next to those, it probably was.
Breathing room
I looked at the empty floor around it. If the room suddenly felt tight, I stopped caring how stylish the sofa looked.
Shape over color
I learned that the wrong shape still feels wrong even in the right fabric. Big arms stayed big arms.
What I checked closely
- Whether the sofa touched the floor naturally
- Whether the shadows made sense
- Whether the angle matched the room photo
- Whether the sofa crowded doors, art, or windows
What usually gave away a bad result
- It looked like it was floating
- The proportions felt oddly stretched
- The fabric ignored the room lighting
- The room looked smaller in a bad way
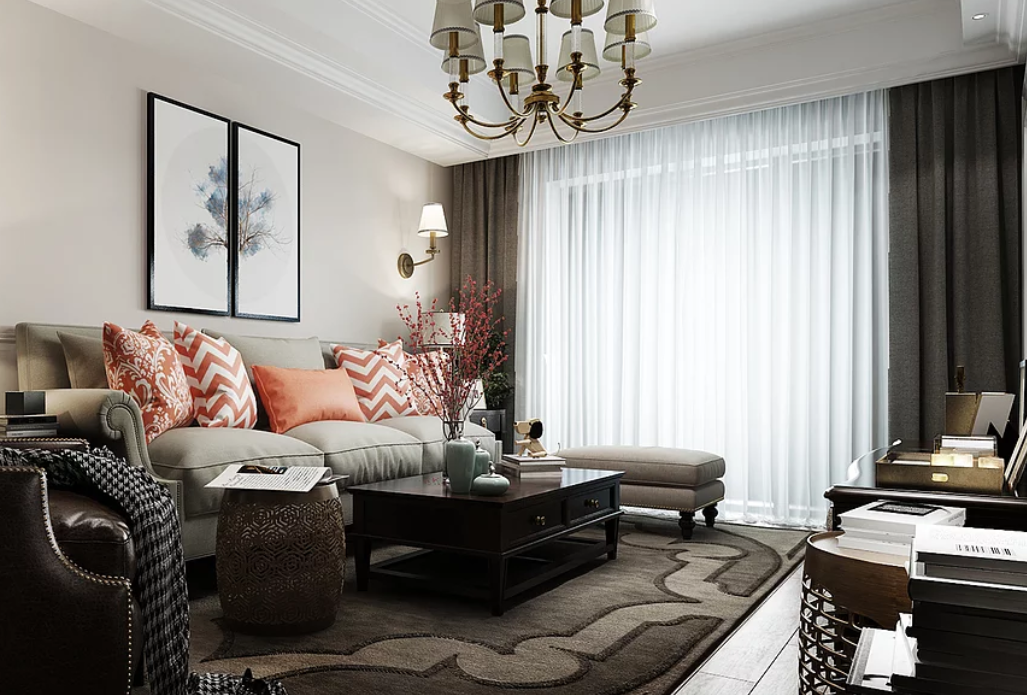
The same problems came back more than once
What I kept doing wrong
- Using a photo that was “good enough” but not really good
- Trusting the first result because it looked polished
- Falling for color before checking size
- Forgetting that delivery is a real-world problem
- Thinking the image replaced measuring
One of the most annoying mistakes was this: I got a result that looked great, got excited, then checked the real measurements and realized the sofa would eat too much of the room. So yes, the image was helpful, but the tape measure still got the last word. Furniture guides say the same thing for a reason.[4]
I found photo-first tools more useful than overcomplicating it
I looked at this two ways. One path is simple: upload a room photo, place the sofa, see what happens. The other path is more technical: build or scan the room more precisely and work from that.
Photo-first AI mockup
This is what helped me fastest. I could test whether the sofa felt right in the real room without turning the process into a full planning job.
But for me, the honest answer was simple: I did not need more complexity. I needed less guessing. A quick room-photo workflow got me most of the way there, then measurements handled the rest.[2][3]
The main thing I learned came in pieces, not all at once
I actually thought at one point that if the sofa looked expensive enough in the mockup, maybe the room would somehow rise to meet it. That is obviously nonsense, but it took me a second to admit it.
The real insight was smaller and more useful: a good sofa fit is not about whether the sofa looks nice by itself. It is about whether the room still feels right after you put it there.
What I use now
        +
clear room photo
        +
clear sofa reference
        +
plain prompt
        +
2 to 4 versions
        +
real measurements
        =
way fewer bad surprises
So now I keep it simple. I use the AI for feel. I use the dimensions for truth. And if the room stops breathing in the image, I move on, even if the sofa looks great on its own.
Frequently asked questions
Can AI really help me decide if a sofa works in my room?
Yes. It helps a lot with visual fit, especially size, style, and placement. It still does not replace real measurements.
What was the biggest mistake in the process?
Using a bad room photo and then trusting the result too fast. A clearer photo usually improves everything.
Should I trust the first AI result?
Usually not. It is much better to compare a few versions before deciding.
Do I still need to measure the room?
Yes. The image helps you feel the fit. The measurements tell you whether it really works.
Sources, references, and image rights
- Uniify.Space, homepage and product flow. Used for statements that Uniify is a photo-first space visualization platform for interiors and that users upload a space photo and describe changes in the AI design workflow. https://uniify.space/
- IKEA, digital room design and Kreativ references. Used for statements that editable, lifelike room replicas can be created from room photos in IKEA’s visualization workflow. https://www.ikea.com/us/en/newsroom/corporate-news/ikea-launches-new-ai-powered-digital-experience-empowering-customers-to-create-lifelike-room-designs-pub58c94890/
- IKEA, sofa layout guidance. Used for statements that buyers should measure the room, draw a floor plan, and account for openings and circulation. https://www.ikea.com/nl/en/rooms/living-room/how-to/what-is-the-best-layout-for-a-sofa-in-the-living-room-pubac6219f0/
- Wayfair, sofa dimensions and measuring guides. Used for statements about taping the sofa footprint and checking doorways, hallways, and obstructions before delivery. https://www.wayfair.com/sca/ideas-and-advice/guides/sofa-dimensions-how-to-choose-the-right-size-sofa-for-your-home-T5595
- West Elm, delivery measuring guide. Used for statements about checking overall width, depth, height, and diagonal depth for sofas and measuring access paths. https://www.westelm.com/pages/ideas-and-advice/measure-for-delivery/
- Apple Developer, RoomPlan overview. Used for statements that RoomPlan uses camera and LiDAR data to create 3D floor plans with room characteristics and dimensions. https://developer.apple.com/augmented-reality/roomplan/
- Hero image rights note. “Living room (Unsplash).jpg” on Wikimedia Commons, attributed to Jarosław Ceborski, originally published on Unsplash before June 5, 2017 and accepted on Commons as CC0 1.0 public-domain dedication. Direct image used for in-article display. File page: https://commons.wikimedia.org/wiki/File:Living_room_(Unsplash).jpg. Direct image: https://upload.wikimedia.org/wikipedia/commons/e/ea/Living_room_%28Unsplash%29.jpg
- Illustrative render rights note. “Living Room 3D Render with Interior Design by NONAGON studio.png” on Wikimedia Commons by Isobelmckenzie, licensed CC BY-SA 4.0. Direct image used for in-article display with attribution. File page: https://commons.wikimedia.org/wiki/File:Living_Room_3D_Render_with_Interior_Design_by_NONAGON_studio.png. Direct image: https://upload.wikimedia.org/wikipedia/commons/b/b1/Living_Room_3D_Render_with_Interior_Design_by_NONAGON_studio.png