
AI interior preview
How to Replace Chairs in a Photo with AI
The first time I tried this, I honestly thought it would be a two-minute job. Upload room photo, add chair photo, done. Instead, the AI gave me chairs that looked half melted, one chair leg disappeared into the rug, and somehow my table changed too. Once I stopped trying to be clever and fixed the inputs, it got easy.



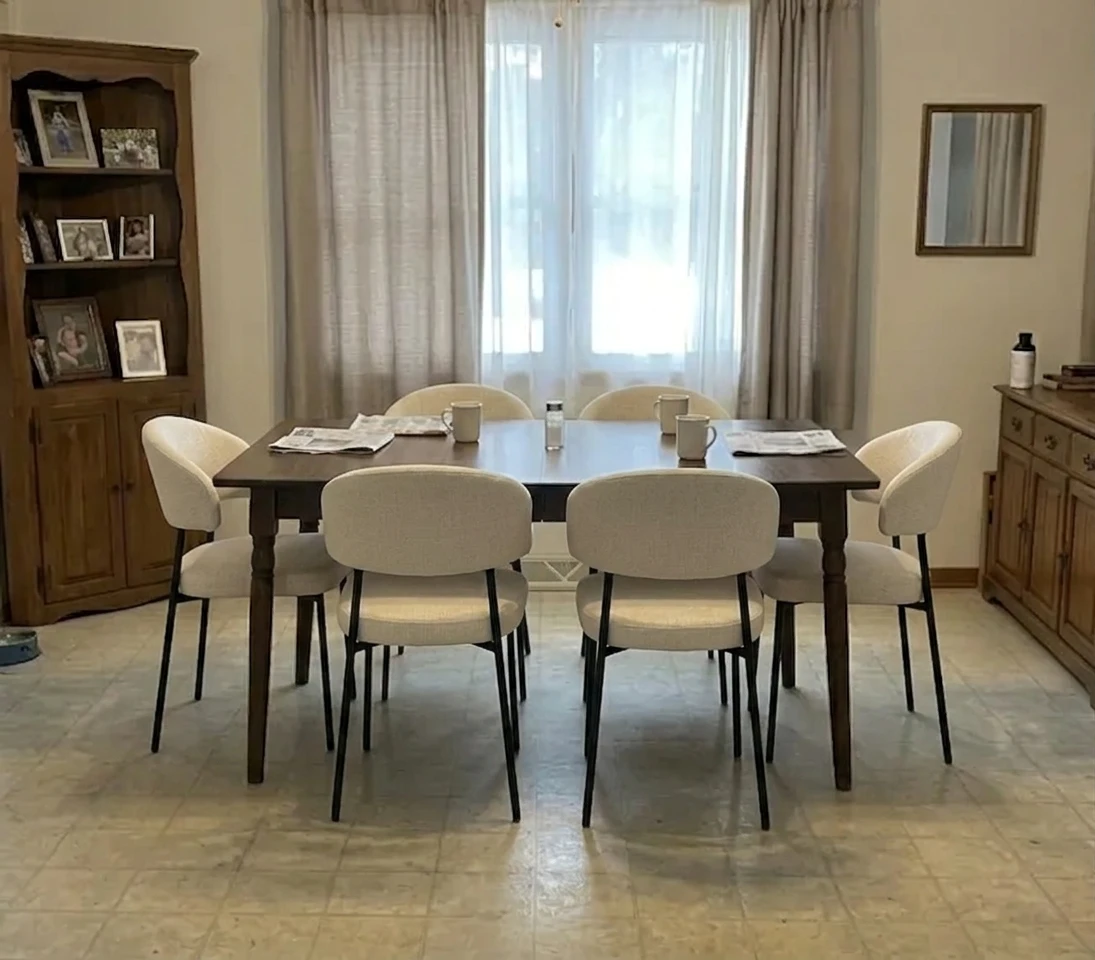
Transformed with AI by Uniify
This is the version I wish I had before I started
I started with a real photo of my dining area and thought the AI would “understand” what I meant. That was mistake number one. I gave it a slightly dark phone photo, grabbed a chair image from a product page, typed something vague like replace these chairs with these, and expected a clean preview. What I got was technically impressive and completely useless.
It looked enough like a result to fool me for three seconds, and then I noticed everything that was off: the scale, the angle, the shadows, the way the new chairs barely belonged to the table.
That was the first useful lesson. AI can do this well, but it does not fix bad input. It amplifies it. Once I accepted that, the whole workflow got simpler.
good result = clear room photo
            + clear chair reference
            + boring, specific prompt

bad result  = messy photo
            + random product image
            + "you know what I mean"
The room photo mistake I made first
I thought the chair reference was the important part. It was not. The room photo was the bigger problem. Mine was slightly cropped, one chair was hidden under the table, and the light was uneven. I could still see the room, so I assumed the AI could too. That was me giving it way too much credit.
When I tried again with a brighter photo where the table, chair backs, and chair legs were actually visible, the edit immediately got better. Not perfect. Just much less stupid.
What helped
- A straight photo, not a dramatic angle
- Enough light to see the chair edges
- No bags, coats, or people covering the chairs
- Real resolution, not a tiny screenshot
What caused problems
- Dark corners
- Chair legs lost in shadow
- Cropped seats or cut-off backs
- Wide-angle distortion from standing too close
Practical takeaway: before touching the prompt, fix the room photo. If the AI cannot clearly read the chairs you want removed, the swap starts broken.
Then I made the reference image mistake
My next bad idea was using a nice-looking chair photo that was actually a terrible reference. The chair was shot from a dramatic side angle in a styled showroom. It looked good to me as a shopper. It looked confusing to the AI.
Once I used a cleaner chair image, with the chair taking up most of the frame and the shape easy to read, the replacement got way more consistent. That was the moment it clicked: the model is not picking “the vibe.” It is trying to match visible form.

Good reference image
- One chair, clearly visible
- Seat, back, and legs easy to see
- Color and material obvious
- Angle not wildly different from the room photo
Bad reference image
- Chair is tiny in a big showroom scene
- Other furniture overlaps it
- Heavy filter changes the color
- Only one strange side view
Practical takeaway: a clean reference beats a fancy reference. Boring wins here.
The prompt that finally worked
I wasted time trying long prompts because I assumed more words meant more control. They mostly made things worse. The prompt that worked was simple, direct, and a little bossy.
Use this:
Replace the existing dining chairs with the chairs from the reference image.
Keep the table, floor, walls, lighting, rug, decor, and camera angle unchanged.
Match the new chairs to the room perspective and realistic scale.
That was enough. In Uniify, I uploaded the room photo, added the chair reference into the AI chat, and used that exact structure. If the first result drifted, I pasted the reference again and repeated the same instruction more clearly instead of inventing a whole new prompt.
That repetition felt dumb the first time I did it. It also helped.
What I expected versus what actually happened
I expected the first output to be final. It usually was not. It was more like a useful draft. One version got the shape right but made the chairs too small. Another nailed the size but changed the wood tone so the whole setup looked colder. Another one was strangely decent except for one backrest that bent like rubber.
That is normal. The first result tells you what the model understood and what it missed. So instead of judging it like a finished render, I started treating it like feedback.
Simple expectation: aim for “good enough to evaluate the furniture” on pass one. Then tighten scale, angle, and material on pass two.
The weird failures that kept repeating
The most annoying problem for me was when the AI replaced the chairs but also quietly redesigned other things. Sometimes the table edge changed. Sometimes the rug pattern softened. Once the room got brighter for no reason, like it had moved to another apartment.
That usually meant I had not said clearly enough what had to stay untouched. Another repeat mistake was assuming the AI would infer the chair count correctly. If six chairs are visible, say six chairs. If two should stay out of frame, say that too.
Weird result
The table changed too
Fix: say “replace only the chairs” and name what must remain unchanged.
Weird result
The new chairs looked too big or too tiny
Fix: add “match realistic scale to the table.”
Weird result
The style was right but the angle was wrong
Fix: use a reference with a more similar viewpoint.
I also made one very human mistake: I kept changing five things at once. New photo, new prompt, new reference, different crop, different wording. Then I had no clue which change actually helped. Once I started changing one variable at a time, the process stopped feeling random.
I honestly thought the magic was in the prompt. Most of the magic was in not giving the model messy material to work with.
What actually matters in practice
The main insight never arrived as one grand revelation. It came in pieces. First, the room photo matters more than I expected. Then the reference image mattered more than the prompt. Then I realized the prompt still mattered, but only because it stopped the AI from wandering off.
So if I had to boil this down into a real-world workflow, it would be this:
Do this
- Upload a clean, bright photo of the actual room
- Add a clear image of the new chair
- Use a simple prompt that says what to change and what to keep
- Judge the first result for direction, not perfection
- Refine one thing at a time
Do not do this
- Start with a blurry screenshot
- Use a reference where the chair is barely visible
- Write a long poetic prompt
- Let the model redesign the whole room
- Panic after one bad output
Floating conclusion, because that is honestly how this feels: AI chair replacement is not hard, but it is picky. The better you show the room, the less you have to explain. The better you show the chair, the less the AI invents. Everything after that is mostly cleanup.
Where Uniify fits: if you want to test chair options in your actual space before buying, uniify.space gives you the simplest workflow: upload the room, drop in the chair reference, tell the AI to replace only the chairs, then iterate until the preview feels believable.
FAQ
Do I really need a reference image?
You can try without one, but the result is usually generic. If you care about a specific chair model, use a reference.
Why did the AI change my table too?
Because the instruction was probably too loose. Tell it to replace only the chairs and keep the table, lighting, floor, and decor unchanged.
What kind of reference image works best?
A clean image where one chair is easy to see. Product photos work well when the chair is large in frame and not blocked by other objects.
Should I expect the first result to be perfect?
No. Expect the first output to show whether the model understood the assignment. Then fix scale, angle, or material in the next pass.
Image credits
- Rick Harris, “Dinner table and chairs,” via Wikimedia Commons. License: CC BY-SA 2.0.
- Rama, “Eames chair,” via Wikimedia Commons. License: CC BY-SA 2.0 FR.