
Real-world AI room preview
How to Replace a Bed in a Photo with AI Before You Buy
I started doing this after almost buying a bed that looked perfect on the product page and somehow wrong in my head every time I pictured it in my room. Using AI to swap the bed into a real photo turned out to be the fastest way to stop guessing and see something close to the truth.
What I learned the messy way is that the result depends less on “magic AI” and more on three boring things: a clean room photo, a usable reference image, and a prompt that tells the model what must stay untouched. This guide is the version I wish I had before the bad first renders.


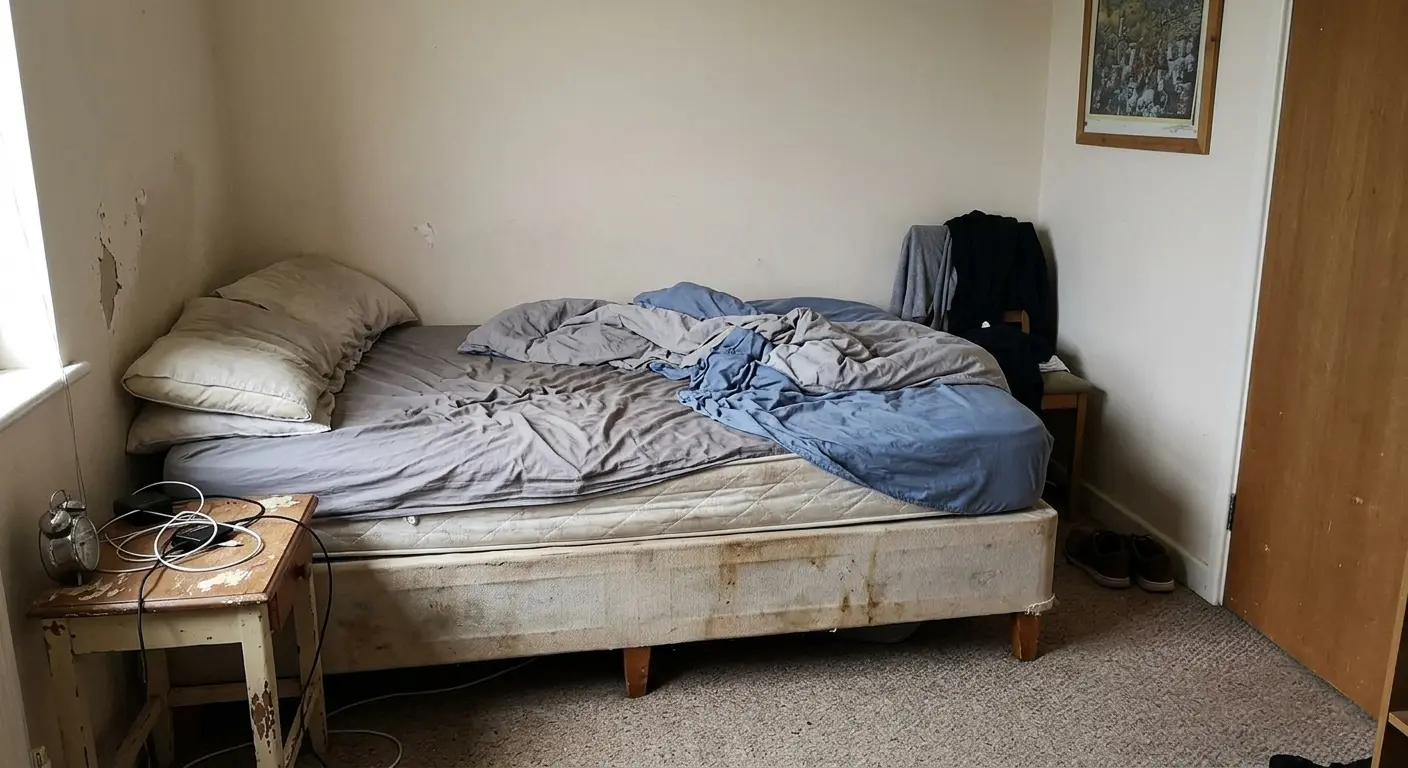
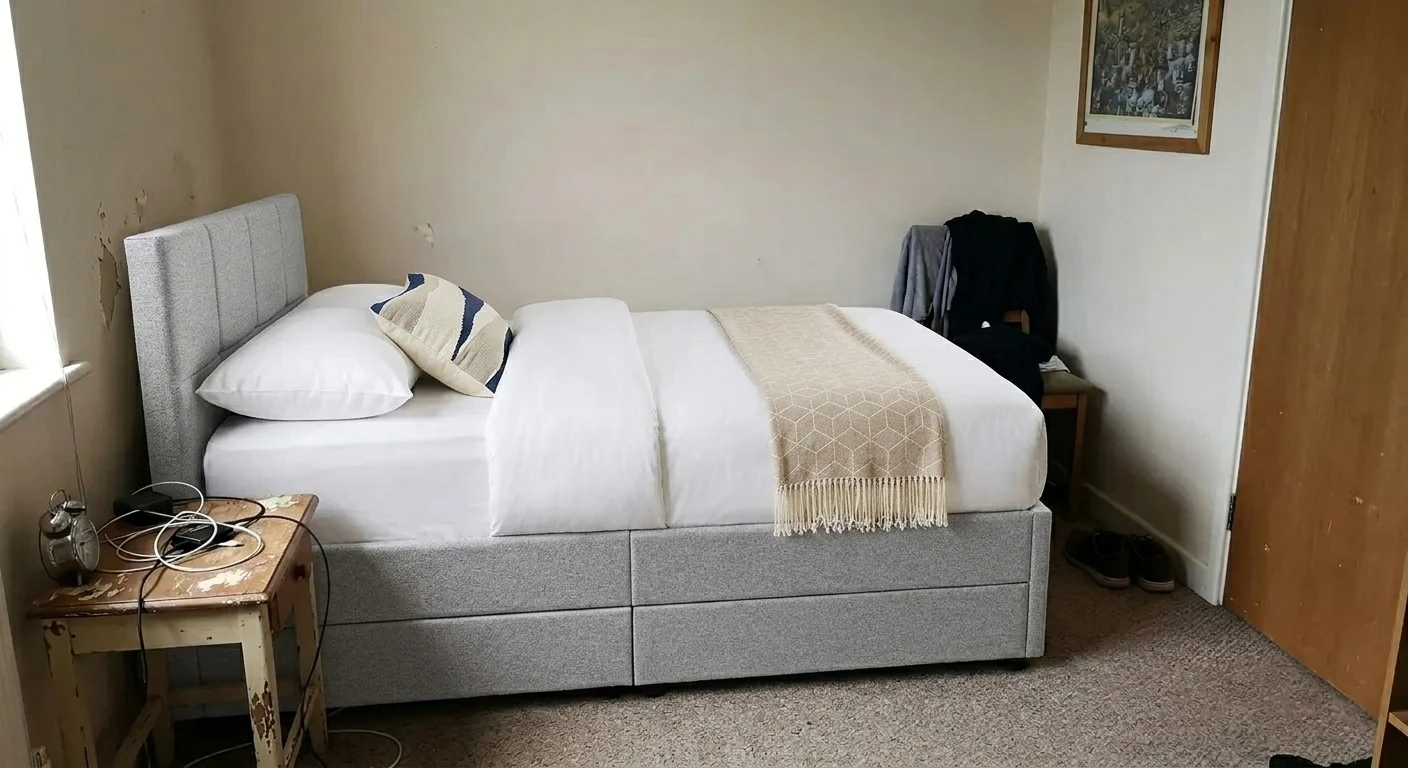
Transformed with AI by Uniify
I first tried this because I was tired of pretending I could “just imagine it.” A bed is too big, too expensive, and too central to the room for that. I wanted to know how it would actually sit against my wall, next to my nightstands, and under the light I already had.
I also realized pretty quickly this is not some weird niche trick. Big shopping and home-design tools already push room previews because people buy more confidently when they can see furniture in context, not floating on a clean white product page.123 AI bed replacement follows the same logic, just with more freedom because you can work from your own photo and your own prompt.
Why replacing a bed in a photo with AI actually works
The short version is this: the room is already there. The floor, wall, windows, angle, and light are fixed. The AI is not inventing a whole bedroom from nothing. It is making one controlled change inside a scene that already has real structure.
Text-only request
That lines up with how modern image editing works. Tools are getting better at localized edits, object replacement, and mask-based changes instead of rebuilding the whole image every time.456
This is where I started, and it was fine for ideas but not for trust. The model had to guess the exact shape, thickness, and style, so the result looked generic.
Reference image added
“Replace the current bed with the bed from the reference image.”
Much better. Now the AI has something concrete to follow instead of inventing the whole thing from a sentence.
Reference + preservation constraints
“Replace only the bed. Keep room layout, floor, wall color, window positions, nightstands, scale, and lighting unchanged.”
This was the point where it stopped feeling like a toy. The image looked more like a believable preview and less like a redesign attempt.
Modern image-editing systems are built for this kind of localized change. OpenAI’s image tools support image editing with chat instructions, and Google Cloud’s image-editing documentation explicitly describes mask-based editing for inserting or replacing objects in part of an image.456
The step-by-step workflow
The steps are simple. The annoying part is that the order really matters. Most of my bad results came from skipping a boring step and hoping the AI would rescue it.
1. Upload your actual room photo
        ↓
2. Add a reference image of the new bed
        ↓
3. Say exactly what should change
        ↓
4. Say what must stay the same
        ↓
5. Answer the follow-up questions
        ↓
6. Generate a few versions
        ↓
7. Compare like a buyer, not a fan
1) Start with a usable room photo
My first bad result came from a lazy photo. Half the bed was hidden, the angle was awkward, and the room was darker than it looked in real life. The AI did its best, but the new bed looked like it had been dropped into the room instead of placed there.
What helps
A normal angle, natural light, the full bed visible, and enough floor around it for the model to understand scale.
What hurts
Dark corners, heavy clutter, cropped bed edges, wide-angle distortion, or blankets hiding the actual frame.
What to preserve
Use your real room, not a polished mockup. The whole point is to test the bed against your actual space, not an ideal version of it.

2) Add a reference image of the new bed
This was the biggest upgrade for me. The moment I stopped asking for “a new bed” and started giving the AI the actual bed I wanted, the results got more believable. The headboard shape, leg style, and frame thickness stopped drifting.
A clean product image usually works best. I made the mistake of using a dramatic lifestyle photo once, and because the angle was completely different from my room shot, the bed came out looking almost right and still wrong enough to bother me.
3) Write the instruction clearly
I got the best results when I stopped trying to sound clever. Short and specific worked better than long and “creative.” The model does not need mood. It needs a job.
Replace the existing bed with the bed from the reference image.
Keep the room layout, wall color, flooring, nightstands, windows,
camera angle, and lighting direction unchanged.
Match realistic scale, perspective, and shadows.
That structure works because it does three simple things:
- The action: swap the current bed.
- The visual source: use the reference image so the AI stops guessing.
- The limits: keep the rest of the room stable and make the scale feel real.
4) Let the AI ask clarifying questions
The first time the tool asked follow-up questions, I thought it was slowing me down. It was actually saving me from the next obvious mistake. A lot of weird outputs come from details nobody bothered to lock down.
- Do you want the new bed in the same size as the old one?
- Should the current bedding stay or change too?
- Do the nightstands remain where they are?
- Should the headboard sit in the exact same spot?
- Keep the same footprint unless I am testing a larger bed on purpose.
- Leave the bedding alone unless I ask for a change.
- Do not move the nearby furniture.
- Do not touch the walls, floor, decor, or window positions.
5) Apply the generated prompt and produce several variations
Do not trust the first render too much. I had one version that looked great for three seconds, and then I noticed the bed was way too wide for the wall. Another had decent proportions but fake shadows. A few versions give you something real to compare.
This also matches how image-editing tools are built. Localized edits usually get better when the bed area is clearly selected and the change is narrowly defined instead of loosely described.456
Prompt formula that usually gives the cleanest result
When the first image is close but still off, I do not start from zero. I tighten the instruction. In my experience, the fixes are almost always about preservation, scale, and light.
Replace only the current bed with the bed shown in the reference image.
Position it where the existing bed is now.
Keep the same room architecture and furniture placement.
Do not change wall color, flooring, window positions, bedside tables,
camera angle, or daylight direction.
Maintain realistic proportions based on the existing bed footprint.
The final result should look like a real photo taken in the same room.
I use this version when the model keeps “helping” too much and starts redesigning parts of the room I never asked it to touch.
How to judge the result like a buyer, not like a content creator
At some point I realized I was judging the nicest-looking render, not the most useful one. That was the wrong goal. The real question is much simpler: Would I still want this bed after seeing it in my actual room?
Fit
Does the bed suddenly make the room feel tight, too low, too bulky, or weirdly narrow next to everything else?
Compatibility
Does the material, color, or headboard style still work with your floor, walls, curtains, and side tables?
Realism
Does it look grounded in the room, or does it still feel pasted on top once you stare at it for a few seconds?
Quick realism checklist
- The bed touches the floor naturally and does not look like it is floating.
- The headboard sits where it should and does not bend outlets, trim, or wall lines.
- The mattress height still makes sense next to the nightstands.
- The light on the bed matches the light in the room.
- The new frame does not warp the rug, side tables, or nearby furniture.
Most common AI mistakes when replacing a bed
The bed is the wrong size
I saw this when the original photo did not show enough of the room or when I forgot to tell the AI to respect the current footprint. If you want believable scale, say so directly. Otherwise the model guesses, and its guesses are not always kind.
The room changes even though you only asked for a bed swap
This is the classic “the AI got ambitious” problem. It starts cleaning up the whole scene, shifting decor, or subtly changing the room mood. The fix is simple: name the things that must not change.
The result looks fake
For me, this usually came down to one of three things: the bed was not grounded to the floor, the shadows did not match, or the reference image came from a totally different angle. When one of those is off, the whole image feels off.
The bedding changes when you only wanted the frame
AI loves filling in blanks. If you do not say whether the bedding stays or changes, it will make that decision for you. Sometimes it guesses right. A lot of the time it does not.
“The previous result changed too much. Keep the room exactly as in the original photo. Replace only the bed frame and headboard. Preserve existing bedding, rug, nightstands, walls, floor, and window light.”
How to use the preview before buying furniture
This is where AI helped me most. Not with final measurements, but with faster decisions. It let me kill bad options early instead of arguing with myself over product photos.
- Use AI to cut the shortlist. Drop the beds that feel too heavy, too tall, too cold, or just wrong in your room.
- Compare real contenders. Put two or three serious options into the same room photo so the comparison is fair.
- Measure after the visual decision. Once a bed looks right, check the actual width, length, headboard height, and walking space.
- Check the furniture around it. A bed can look fine in isolation and still crowd side tables or shrink the path around the room.
That is the balance that finally made sense to me: AI is for confidence and filtering. A tape measure is for the final yes or no.
Why this method is better than guessing from a product page
A product page shows the bed in a room built to sell the bed. This shows the bed in the room you actually have to live with. That difference sounds small until you see how much easier the decision becomes.
Product page only
You are judging the bed in somebody else’s perfect room, with different walls, floor, spacing, and camera angle.
AI room preview
You are judging the same bed against your real room shape, your furniture, and your actual light.
Best use case
It is ideal for shortlisting, avoiding obvious mistakes, and getting more certain before you buy.
A faster way to do this on Uniify
If you want this in one flow instead of bouncing between tabs, uniify.space fits the job well. Its public product flow is built around uploading a real room, changing what you want with AI, and generating updated interior visuals from that starting point.7
Practical CTA
If your goal is simple — upload the room, show the new bed, keep the rest of the space stable, and compare believable versions — that is exactly the kind of workflow that makes sense inside www.uniify.space.
Bottom line
For me, the biggest shift was stopping the old question — “Do I like this bed on the website?” — and replacing it with a better one: “Does this bed still look right once it is in my room?” AI is very good at helping with that second question.
You still need measurements. You still need common sense. But a clean room photo, a solid reference image, and a clear prompt can save you from a lot of bad guessing.
FAQ
Can AI accurately show how a new bed will look in my room?
Yes, well enough to be genuinely useful. It can show style, color fit, visual weight, and rough proportion. I would still measure everything before paying.
Do I need a reference image of the new bed?
I would not skip it. Text-only prompts are okay for rough ideas, but a reference image is what makes the result start looking like the bed you actually want.
What is the best prompt for replacing a bed in a photo?
The best prompts are not fancy. They say what to replace, what image to follow, and what must stay unchanged. Example: “Replace the existing bed with the bed from the reference image. Keep the room layout, flooring, windows, nightstands, lighting direction, and camera angle unchanged. Match realistic scale and shadows.”
Why does AI sometimes make the new bed look too big or too small?
Usually because the room photo was weak, the bed edges were hidden, or the prompt never told the model to preserve the existing footprint. The AI fills gaps with guesses.
Is this good enough to buy furniture without seeing it in person?
It is good enough to save you from a lot of bad options early. I would still use it as a strong filter, then confirm the dimensions and clearance before buying.
References
- Google Merchant Center Help, “Display your products in 3D and augmented reality.” https://support.google.com/merchants/answer/13675100?hl=en
- IKEA Global, “Launch of new IKEA Place app.” https://www.ikea.com/global/en/newsroom/innovation/ikea-launches-ikea-place-a-new-app-that-allows-people-to-virtually-place-furniture-in-their-home-170912/
- Houzz Blog, “Houzz Brings Augmented Reality to Home Design and Decorating.” https://blog.houzz.com/houzz-brings-augmented-reality-to-home-design-and/
- OpenAI Help Center, “Editing your images with ChatGPT Images.” https://help.openai.com/en/articles/9055440-editing-your-images-with-chatgpt-images
- OpenAI API Docs, “Image generation.” https://developers.openai.com/api/docs/guides/image-generation
- Google Cloud Docs, “Edit images with Imagen on Vertex AI” and “Insert objects into an image using inpaint.” https://docs.cloud.google.com/vertex-ai/generative-ai/docs/image/edit-images-overview · https://docs.cloud.google.com/vertex-ai/generative-ai/docs/image/edit-insert-objects
- Uniify Space homepage. https://uniify.space/
- Hero image attribution: Wikimedia Commons, “Bedroom large double bed.jpg” by IFERREIRO, licensed CC BY-SA 3.0. https://commons.wikimedia.org/wiki/File:Bedroom_large_double_bed.jpg
- Inline image attribution: Wikimedia Commons, “Hotel Room with queen size bed.jpg” by Tim36272, licensed CC BY-SA 3.0. https://commons.wikimedia.org/wiki/File:Hotel_Room_with_queen_size_bed.jpg

