I uploaded my house photo to an AI visualizer. The first result was honestly a mess.
I thought I would upload one picture, click “futuristic,” and get a clean dream-home render in a few seconds.
That is not how it went. The tool was useful, but only after I stopped treating it like magic and started giving it better photos, simpler direction, and more realistic expectations.


What actually happened when I tried it
I started with a normal photo of a house. Nothing fancy. Just a straight shot from the outside.
The idea was simple: upload the house, scroll through the styles, pick the futuristic option, and see what the place could look like if money, time, and boring design choices were less of a problem.
I had seen those clips where someone says, “If people did not lose half their money to taxes, houses would look like this.” I get why that line works. It is dramatic. It makes you want to see the before and after.
So I tried it. And the first version looked expensive, yes, but also kind of wrong. The roof changed too much. One window became a glowing rectangle. The driveway looked like it was made for a small spaceship. Not terrible. Just not something I would actually build.
My first mistake: I expected one click to solve the design
I thought “futuristic” meant the AI would understand what I wanted. Clean lines. Bigger glass. Better lighting. Maybe a nicer entrance.
But “futuristic” can mean anything. It can mean warm modern. It can mean luxury villa. It can mean chrome bunker. It can also mean a house that looks like it is waiting for aliens.
That was the mistake. I picked a style, but I did not give enough direction.
What I did first
Uploaded a random photo and clicked one broad style.
What worked better
Used a cleaner photo and asked for a specific kind of futuristic look.
The second try was better, but still not perfect
I went back and used a better photo. Less shadow. Less clutter. More of the house visible.
This time the result made more sense. The AI kept more of the original structure. It added bigger windows, cleaner wall panels, and nicer lighting around the entrance.
Still, it made one weird choice. It turned a normal side wall into something that looked like a hotel lobby. I do not know why. Maybe the angle confused it. Maybe the style was still too strong.
That is when I stopped looking for the perfect render and started looking for useful ideas inside the render.
What finally helped
The biggest improvement came from being boring.
I stopped asking for a “crazy futuristic house.” I asked for a modern exterior with clean lines, warm lighting, larger windows, a simple entrance, and realistic materials.
That sounds less exciting, but it gave me a better result.
Transform this real house into a realistic futuristic modern home. Keep the main structure. Add clean lines, larger windows, warm exterior lighting, simple landscaping, and premium but buildable materials. Avoid fantasy shapes.
That one change matters. The AI needs limits. Without limits, it starts showing off.
What you should expect before trying it
Expect ideas, not a finished building plan.
That sounds obvious, but I forgot it at first. I looked at the render like it was supposed to be a real renovation proposal. It is not. It is more like a fast mood board built from your own house.
You might get one amazing detail and three bad ones. That is normal.
The main insight came slowly
I thought the point was to see a “future version” of the house.
But the real value was smaller than that. It helped me notice what I actually liked.
I liked wider glass, but not full glass walls. I liked hidden lighting, but not glowing lines everywhere. I liked a cleaner entrance, but not a complete new shape. That was useful.
It also made one thing very clear: the best AI result is not always the most dramatic one. Sometimes the best result is the one that keeps the house recognizable.
My simple process now
After messing around with it, this is the process I would use again.
- Take a clean photo in daylight.
- Remove cars, bins, and random objects if possible.
- Upload the photo to a visualizer like Uniify.
- Start with one style, not five.
- Use “futuristic” carefully. Add words like realistic, warm, buildable, clean, and simple.
- Generate a few versions.
- Do not judge the whole image. Pull out the parts that are actually useful.
The funny thing is, I thought I needed a wild result. I did not. I needed a result that made me say, “Okay, that entrance could work,” or “That window shape is better,” or “That lighting changes the whole house.”
One version still looked slightly ridiculous. Like a luxury garage for a billionaire who owns too many drones. But even that one had a good wall texture.
So, is it worth trying?
Yes, if you use it for the right reason.
Use it to explore. Use it to explain your taste. Use it when you cannot describe what you want, but you know you will recognize it when you see it.
Do not use it as proof that a house can be built exactly like the render. That part still needs real people, real measurements, real budget, and real building rules.
But as a first step, it is surprisingly helpful. Not because every output is good. Because even the bad outputs teach you what you do not want.
Frequently asked questions
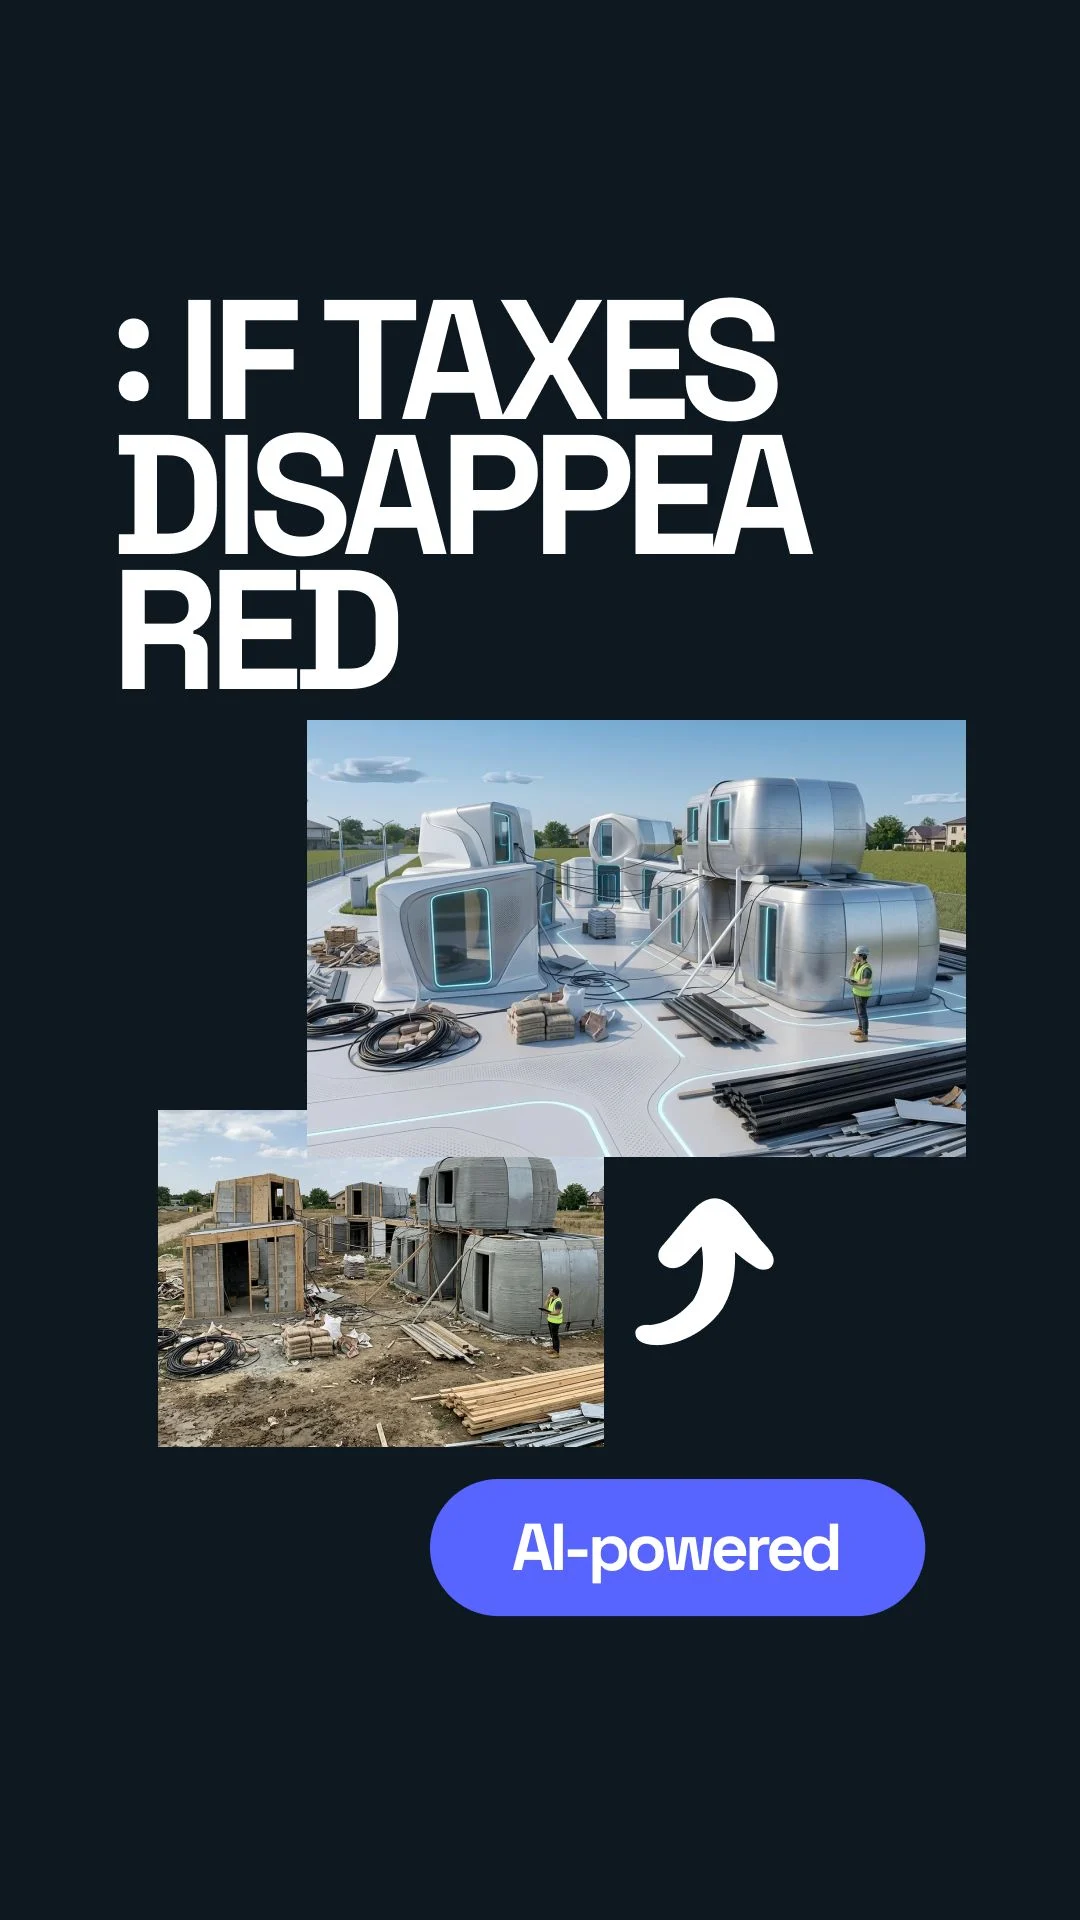
Can I upload a house that is still under construction?
Yes. It can work well, especially if the shape of the building is already clear.
Why did my result look too fake?
The style was probably too broad or too extreme. Try asking for realistic materials, simple geometry, and buildable changes.
Should I use the futuristic style first?
You can, but I would also test modern, minimalist, luxury, and warm contemporary styles. Sometimes those give better “future” results than the futuristic label itself.
Can this replace an architect?
No. It helps you find direction. An architect or designer turns that direction into something that can actually be planned and built.
Where should I try it?
You can start with Uniify if you want a simple way to test home visuals and explore different design directions.
Image note
Hero image is used from Unsplash as an architectural inspiration image. Always check the current image license and photographer attribution requirements before publishing in a commercial CMS.