Kitchen Visualisation • AI Renovation Workflow
AI Kitchen Facade Makeover: Preview Cabinet Changes From a Real Photo
Cabinet fronts dominate the look of a kitchen, yet they are notoriously hard to judge from swatches, renders, or inspiration boards alone. The smarter workflow is to start from your actual room, preserve the real layout, and use AI to test targeted facade changes before you commit money to paint, refacing, or replacement.
Done well, this turns AI from a novelty into a decision tool: you can compare warm white against sage, shaker against slab, satin against matte, and wood veneer against painted fronts without guessing how those choices will behave beside your counters, floor, splashback, and lighting.


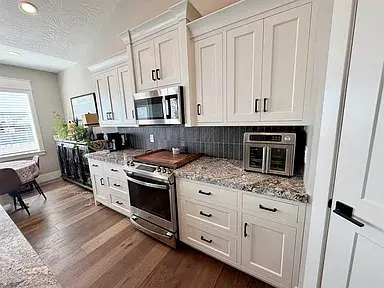
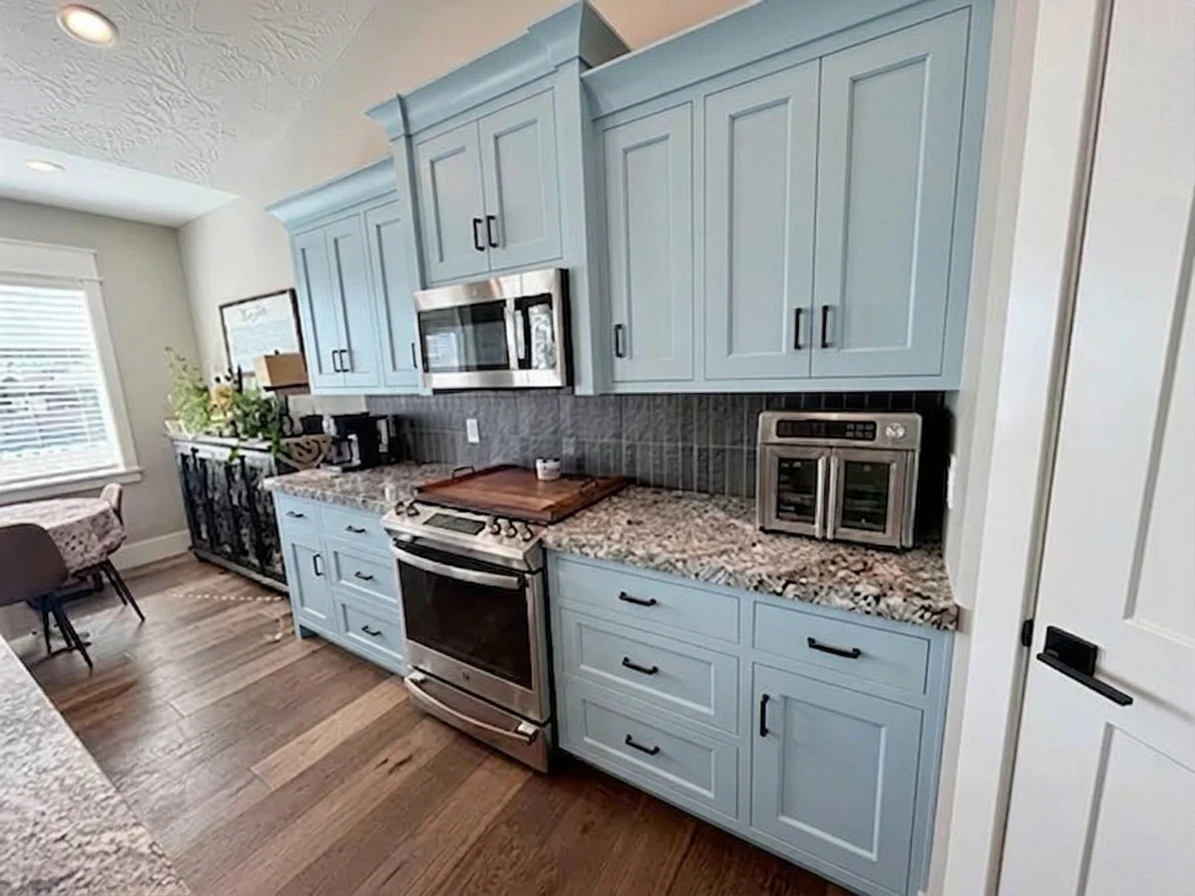
Transformed with AI by Uniify
What this article will help you do
Use AI to preview new cabinet colours, finish levels, and facade styles on your own kitchen photo without accidentally redesigning the whole room. The goal is not fantasy inspiration. The goal is better renovation decisions.
Tell the model to preserve the kitchen and change only the facades. The more precisely you lock layout, counters, splashback, appliances, and lighting, the more useful the output becomes.
Why real-photo previews beat mood boards
A cabinet colour rarely succeeds or fails in isolation. It succeeds inside a system: floor undertone, worktop pattern, backsplash reflectivity, daylight direction, and artificial lighting. That is why a sample card can feel elegant in the shop and unexpectedly yellow, flat, or heavy once it covers twenty cabinet doors at home.
Real-photo AI editing solves a different problem than Pinterest-style inspiration. Instead of imagining a new kitchen from scratch, you test one controlled change inside your existing constraints. That gives you a faster answer to the question that matters most: will this actually work in my room?
Real kitchen photo → Lock what stays → Change only facades → Generate 3–5 controlled variations → Compare on screen → Validate with samples and contractor
Where this method works best
Best for cosmetic upgrades
It excels when you are repainting cabinets, testing new door fronts, swapping hardware, or checking whether a warmer or darker scheme still feels balanced with the rest of the kitchen.
Strong for stakeholder alignment
It also helps when you need a spouse, designer, supplier, or contractor to react to the same visual reference instead of discussing abstract colour names.
AI concept images do not confirm paint chemistry, manufacturing tolerances, hinge clearances, edge profiles, or true installed cost. They reduce uncertainty early; they do not replace technical decisions later.
The seven-step workflow
1. Start with a photo the model can read
The model needs straight lines, visible door edges, and usable lighting. Photograph the kitchen front-on where possible. Keep the whole cabinet run visible, remove clutter, and avoid low-resolution screenshots.
- Use daylight or evenly mixed lighting.
- Keep verticals as straight as possible.
- Show door gaps, handles, fillers, and end panels.
- Capture enough countertop and floor to judge contrast.
2. Choose a photo-editing workflow, not a blank-image generator
You want an upload-and-edit process that starts from the real room. That distinction matters. Blank generation is good for style exploration. Photo editing is better for decision support because it respects your existing architecture.
That is the practical role a workflow around uniify.space can play: collect the source photo, run controlled prompt iterations, and compare variations in a cleaner decision flow instead of scattering tests across disconnected tools.
3. Write the brief in two parts: preserve, then change
Most poor AI kitchen mockups fail because the instruction is too vague. “Modernize my kitchen” invites the model to move walls, invent counters, swap lighting, and redesign appliances. A better instruction first freezes the room, then specifies the exact facade intervention.
Lock what stays
Layout, worktops, backsplash, sink, tap, flooring, window positions, appliance locations, room proportions, shadows, and overall camera angle.
State what changes
Door style, drawer-front style, colour family, sheen level, hardware finish, wood species or veneer look, and realism requirement.
4. Generate fewer, stronger directions
Do not ask for twelve tiny shade variations in the first pass. Start with three to five distinct directions that answer a real design question.
- Warm white shaker
- Muted sage repaint
- Light oak slab fronts
- Walnut lowers with off-white uppers
- Charcoal flat-panel concept
5. Refine using follow-up constraints
This is where a rough mockup becomes a useful one. Keep pushing the model back toward realism.
- “Keep the same handles. Change only the door finish.”
- “Make the white warmer, not cooler.”
- “Reduce gloss. Use satin, not semi-gloss.”
- “Do not alter the countertop pattern or appliance placement.”
- “Preserve the existing natural shadows.”
6. Compare on function, not just style
At this stage, ask operational questions. Does the room feel darker? Does the hardware look oversized? Does a high-contrast scheme shrink the kitchen visually? Do upper cabinets now compete with the veining in the countertop?
7. Only then validate in the real world
Once one or two directions survive the screen test, move into physical validation: paint chips, door samples, finish samples, and supplier conversations. AI should narrow the field before you spend money, not become the final word.
Think of the AI image as a fast pre-brief. It is the cheapest place to be wrong.
Repaint vs reface vs replace
Homeowners often mix these up, and AI is especially useful because each option can look similar in a mockup while carrying very different cost, scope, and construction implications.
Repaint
Best when the existing doors are worth keeping and you only need a colour and sheen change. Lowest disruption, fastest decision cycle, but it does not alter door profile or layout.
Reface
Best when cabinet boxes are sound but the visible fronts feel dated. You keep much of the existing carcass and replace the visible fronts and finish surfaces for a more transformative visual change.
Replace
Best when layout, storage logic, or cabinet condition is fundamentally wrong. Highest flexibility, highest cost, and the least suitable scenario for “facades only” prompting.

If the inside of the kitchen no longer works, a facade makeover will not fix the problem. An AI mockup can make the room look newer while hiding the fact that storage, access, and workflow still need a deeper redesign.
How to write prompts that preserve reality
High-quality prompts do three jobs at once: they anchor the original photo, define the design change, and demand photorealistic restraint.
Use this exact kitchen photo. Keep the layout, countertop, backsplash, flooring, appliances,
window positions, and lighting unchanged. Change only the cabinet facades to [STYLE] in [COLOUR]
with a [MATTE / SATIN / SEMI-GLOSS] finish and [HANDLE TYPE / NO HANDLE]. Preserve realistic
shadows, accurate cabinet proportions, and a true renovation-photo look.
Six practical prompt examples
Warm white refresh
Keep everything unchanged except the cabinet facades. Recolour them in a soft warm white with a satin finish. Preserve the existing door style, hardware, lighting, and realistic proportions.
Flat-panel modernisation
Keep the kitchen structure exactly the same. Replace the visible cabinet fronts with warm-gray slab doors and integrated minimalist pulls. Do not alter the countertops, splashback, or appliances.
Two-tone wood concept
Using this exact photo, change only the lower fronts to walnut veneer and the upper fronts to matte off-white. Preserve shadows, reflections, and the camera angle.
Budget repaint preview
Do not redesign the room. Keep the same doors and handle positions. Repaint the cabinet facades in muted sage green with a satin finish, with realistic lighting and no layout changes.
Classic shaker upgrade
Transform only the cabinet fronts into cream-painted shaker facades with slim aged-brass handles. Keep all existing architectural elements identical and photorealistic.
High-contrast contemporary
Keep the current kitchen unchanged except for the facades. Use matte black lowers and light-oak uppers. Preserve room dimensions and avoid stylised rendering.
What actually changes the look most
Many people focus only on hue, but three variables usually control the result more strongly than expected:
- Light quality. Warm vs cool light affects how cabinet colour reads across the room.
- Finish level. Matte, satin, and glossier finishes reflect light differently and change the visual weight of the cabinetry.
- Door profile. The same colour can read minimalist on slab fronts and traditional on shaker fronts.

Mistakes that make AI previews unreliable
Being too vague
“Make it nicer” or “make it more luxurious” gives the model permission to redesign the entire kitchen.
Not freezing the room
If you forget to say what must stay unchanged, the model may swap counters, floors, and lighting without warning.
Using a weak photo
Blur, severe perspective distortion, and heavy clutter make doors warp and edges disappear.
Trusting one image
Single outputs can flatter one option unfairly. Generate a small comparison set and judge the pattern, not one lucky render.
Reality checks before you spend
- View the winning option on more than one screen.
- Check the kitchen photo under day and evening conditions.
- Order samples for finalists only.
- Ask whether the change is truly cosmetic or whether storage/layout problems remain.
- Use the image to brief a pro, not to replace one.
Build a short decision board with one original photo and three AI variations. Add notes under each option: what improves, what gets riskier, and what must be validated physically. That is where this workflow becomes genuinely useful.
Bottom line
An AI kitchen facade makeover is valuable because it lets you test decisions in context. You stop choosing cabinet colours in a vacuum and start evaluating them against the room that actually exists. For repainting, refacing, and style-direction choices, that can save both money and indecision.
The best results come from restraint: one real photo, one tightly defined change, a handful of strong variations, and a final handoff to real-world samples and suppliers. Used that way, AI does not replace design judgment. It sharpens it.
Uniify.space is a natural fit for turning upload + prompt + comparison into a more polished client or homeowner experience, especially when you want fast facade concepts from real photos rather than generic inspiration boards.
FAQ
Can AI realistically show a new cabinet colour on my existing kitchen?
Usually yes, provided the starting photo is sharp and the prompt explicitly says to preserve layout, surfaces, and lighting while changing only the facades. It is strongest as a visual direction tool, not a final specification.
How many options should I generate?
Three to five distinct options is usually enough. Fewer than three can feel arbitrary, while too many variants often blur the decision instead of clarifying it.
Can I trust the finish level I see in the AI image?
Only partially. AI can suggest the mood of matte, satin, or glossier finishes, but exact reflectivity depends on real light sources, product chemistry, and surface preparation.
When should I skip AI and go straight to a contractor?
If your problem is layout, storage access, water damage, poor cabinet condition, or structural change, AI facades alone will not answer the real question. In those cases, start with a renovation professional.
Does this work for replacement fronts as well as repainting?
Yes. In fact, it is especially useful for checking whether a new door profile or two-tone scheme genuinely improves the room before you order fronts or commit to refacing.
References
- U.S. Department of Energy — LED Basics
- Illuminating Engineering Society — Color Rendering Index (CRI) definition
- U.S. Department of Energy — LED Color Characteristics
- This Old House — Cabinet Refacing: Everything You Need to Know
- National Kitchen & Bath Association — Kitchen Cabinet Cost Considerations
- Benjamin Moore — Kitchen Cabinet Paint Colors
- Benjamin Moore — How to Choose a Paint Finish
Image rights note: Embedded images in this article are sourced from Wikimedia Commons and include attribution and licence information in each figure caption. Reuse must follow the licence attached to each individual image.